Where do I begin? Watch me try to build a 24x36 and 30x60 3D table with 6” skirts and 3/4” hole system utilizing the Fireball drill template.
Learn from my mistakes. Carving out two tables from 1/2” plate was a noble but dumb idea. I was convinced from a couple of videos floating around that I could easily and accurately make all my cuts utilizing a skilsaw for metal. Tried a couple different cuts, 1/8-1/4-full depth but the blade will just wander and begin to under cut, even utilizing a fence. The cuts were amazing until they weren’t.
Purchasing a Dragon Wagon would’ve been an equitable decision. I set out to build my own simply because I wanted something more than the 54x30. Really love the product line but there isn’t the in-between size and price point that suits me.
I’ll follow through with my folly and provide updates along the way.
This project has been sidelined since May but I got a chance to work on it today. 10 abrasive cut-off wheels just to drop the satellite table. Now I’ve got to figure out photos
Skilsaw Outlaw as pictured above. Saw made for metal. Factory blade was ok. Had a Diablo Cermet blade on hand which cut better but undercut about 36” into 48” cut @1/4” depth. Not forcing it. Letting it just walk through the steel like butter. Is what it is.
May try it again on shorter cuts using a new 50” straight edge
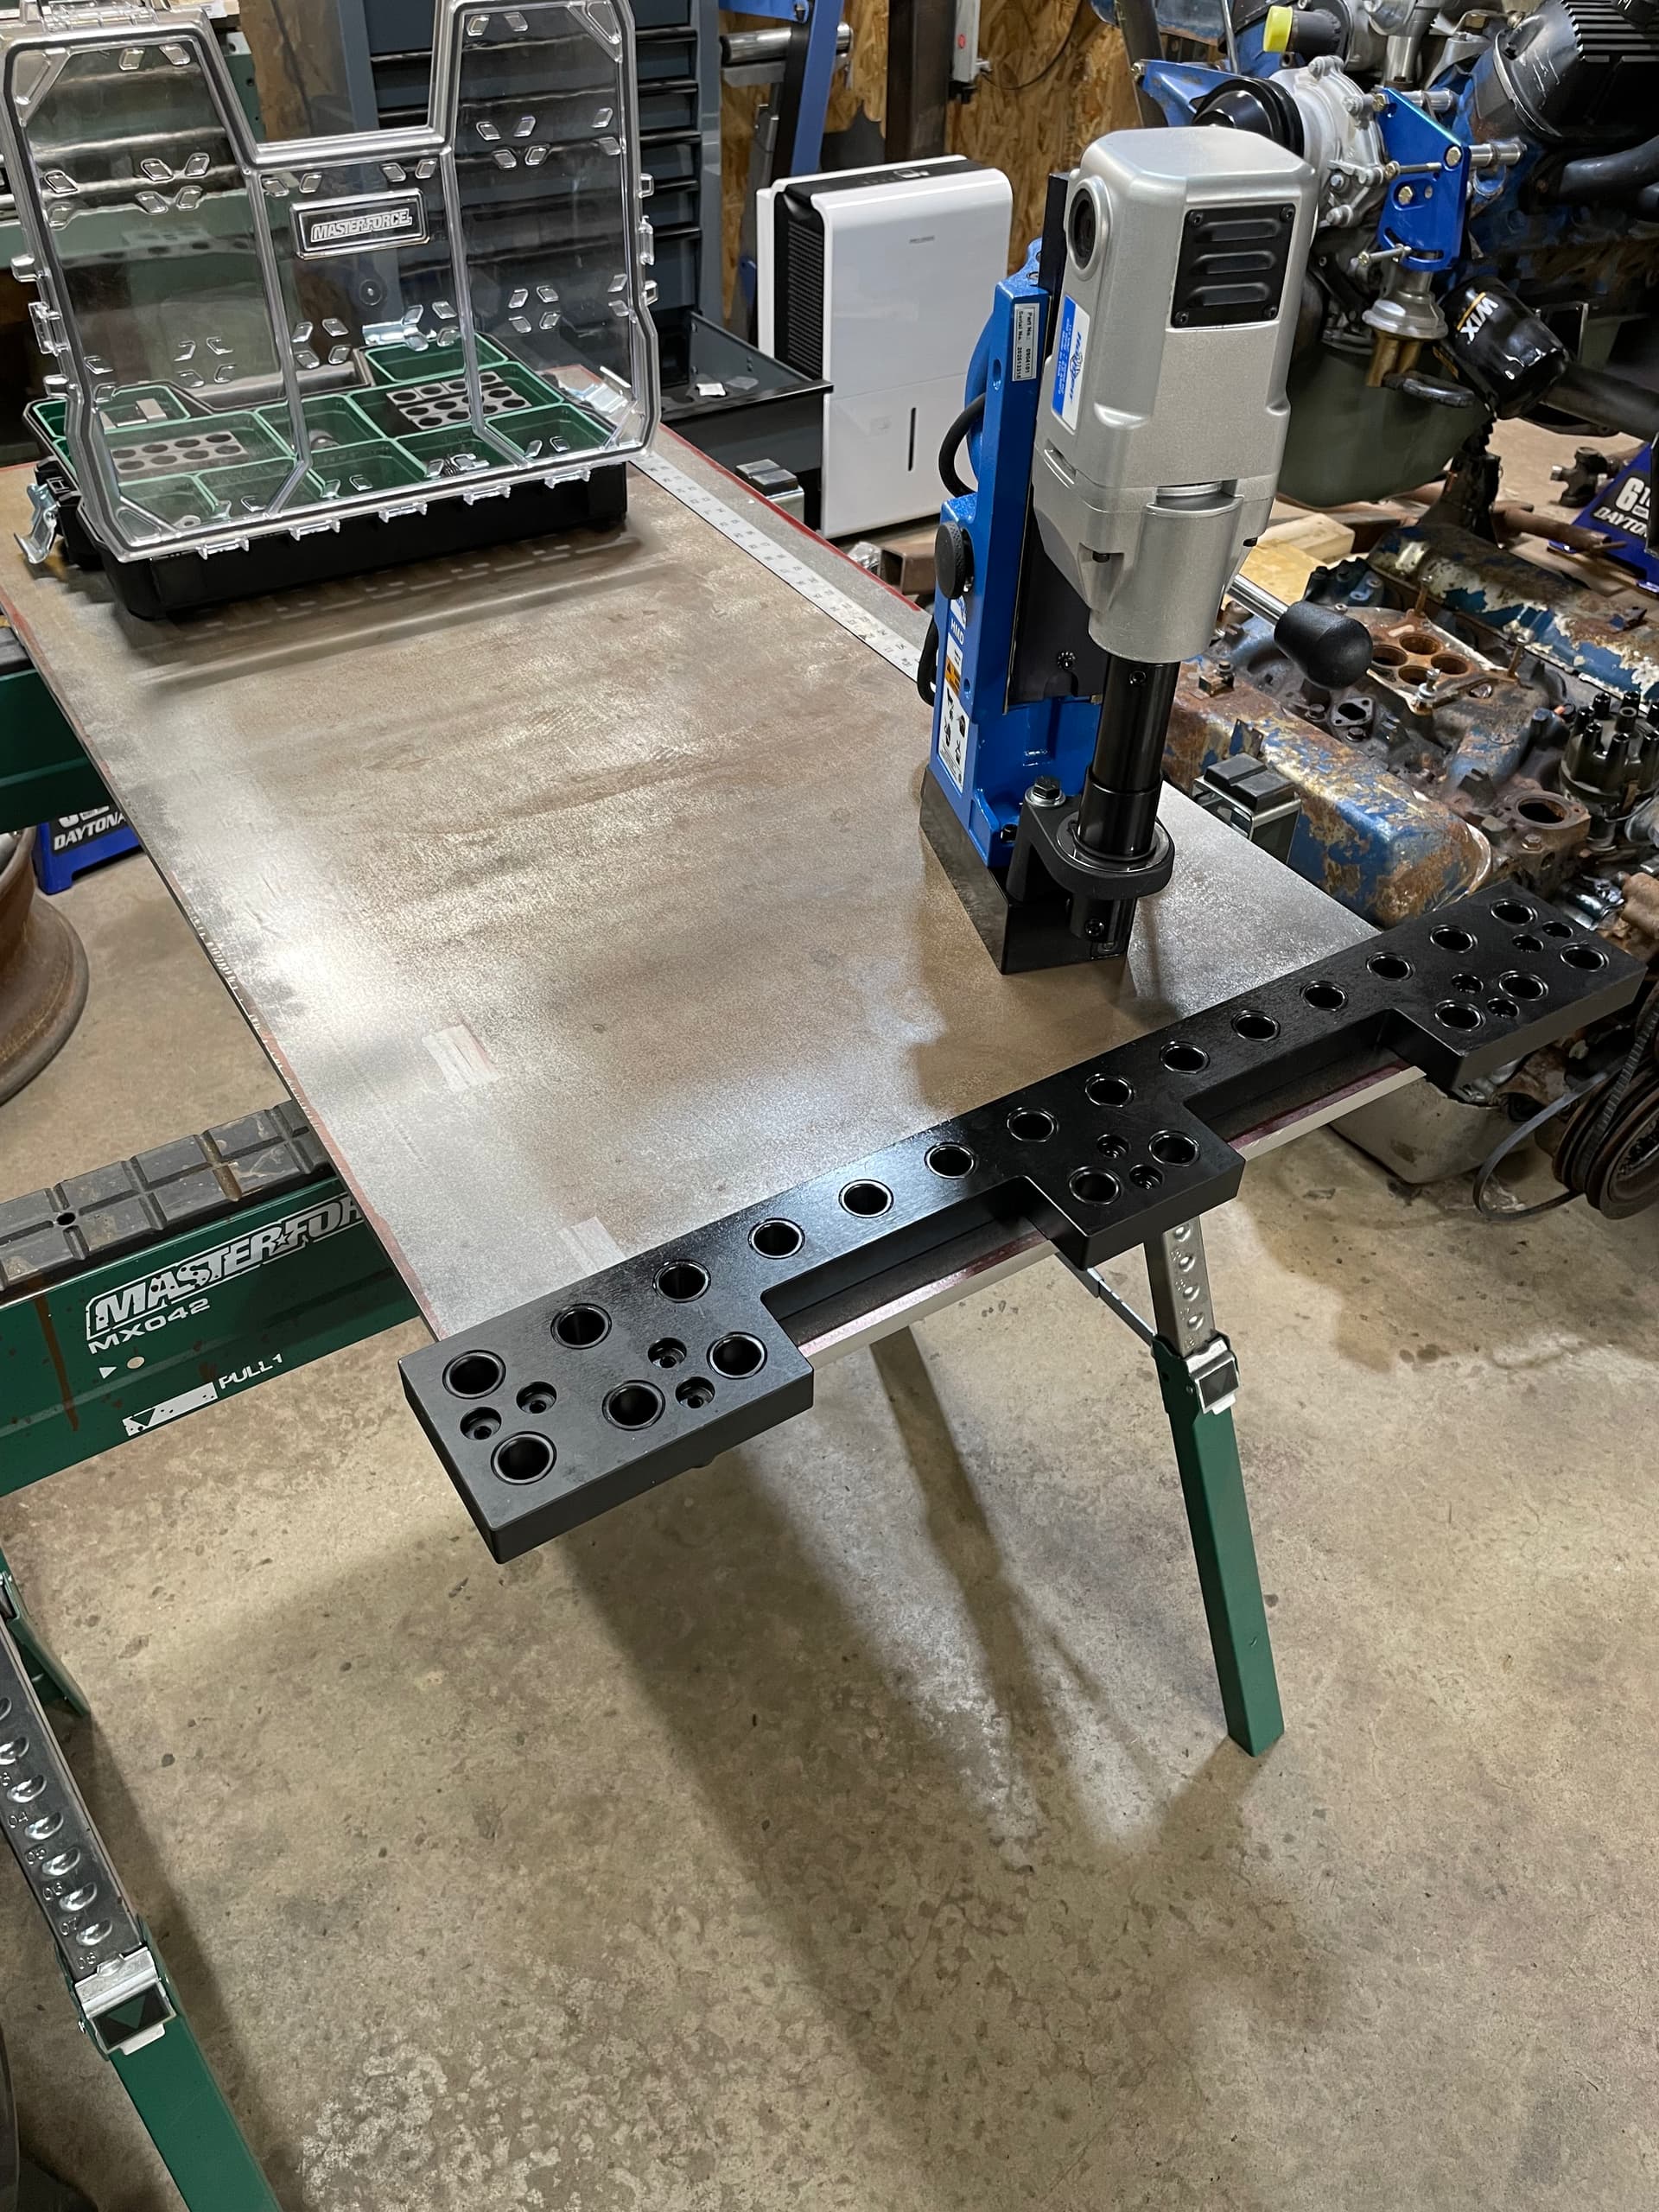
Edges of 24x36 table are prepped. Drill fixture in place. Will begin 299 holes tomorrow.
I’ll try to explain this the best I can. The two table surfaces and their respective skirts are “dropped” as one. I’ll drill the skirts first utilizing the table top surface for the mag drill. Once the skirts are drilled, I’ll drop them, dress the table top edges and proceed with their holes.
The underside of each table will have a grid of 1/4” x 5” webbing. Legs are 4x4x.120. Height is 42”. The main table will otherwise be stationary with leveling pads and the satellite will be on casters full time. Both tables can be joined in any config as inspired by the Fireball lineup.
Both (cermet) blades are rated for 4,200 and are arbor specific for metal saws. The outlaw is 3,900 vs 5,300 for wood.
One question I couldn’t get a clear answer on is depth of cut or depth of blade for given material thickness. For 1/2” material what’s more advantageous, 1/2” blade depth or max plunge?
The tool undoubtedly wants to eat and was cutting the material just fine until the blade warped and began to curve and undercut due to blade deflection at any depth strategy. (Heat and poor quality straight edge at fault) I still plan to use it on shorter cuts as it’s much faster and accurate vs free handing with a grinder. Even though the fibers are the devil. Imagine a steel wool bomb went off!
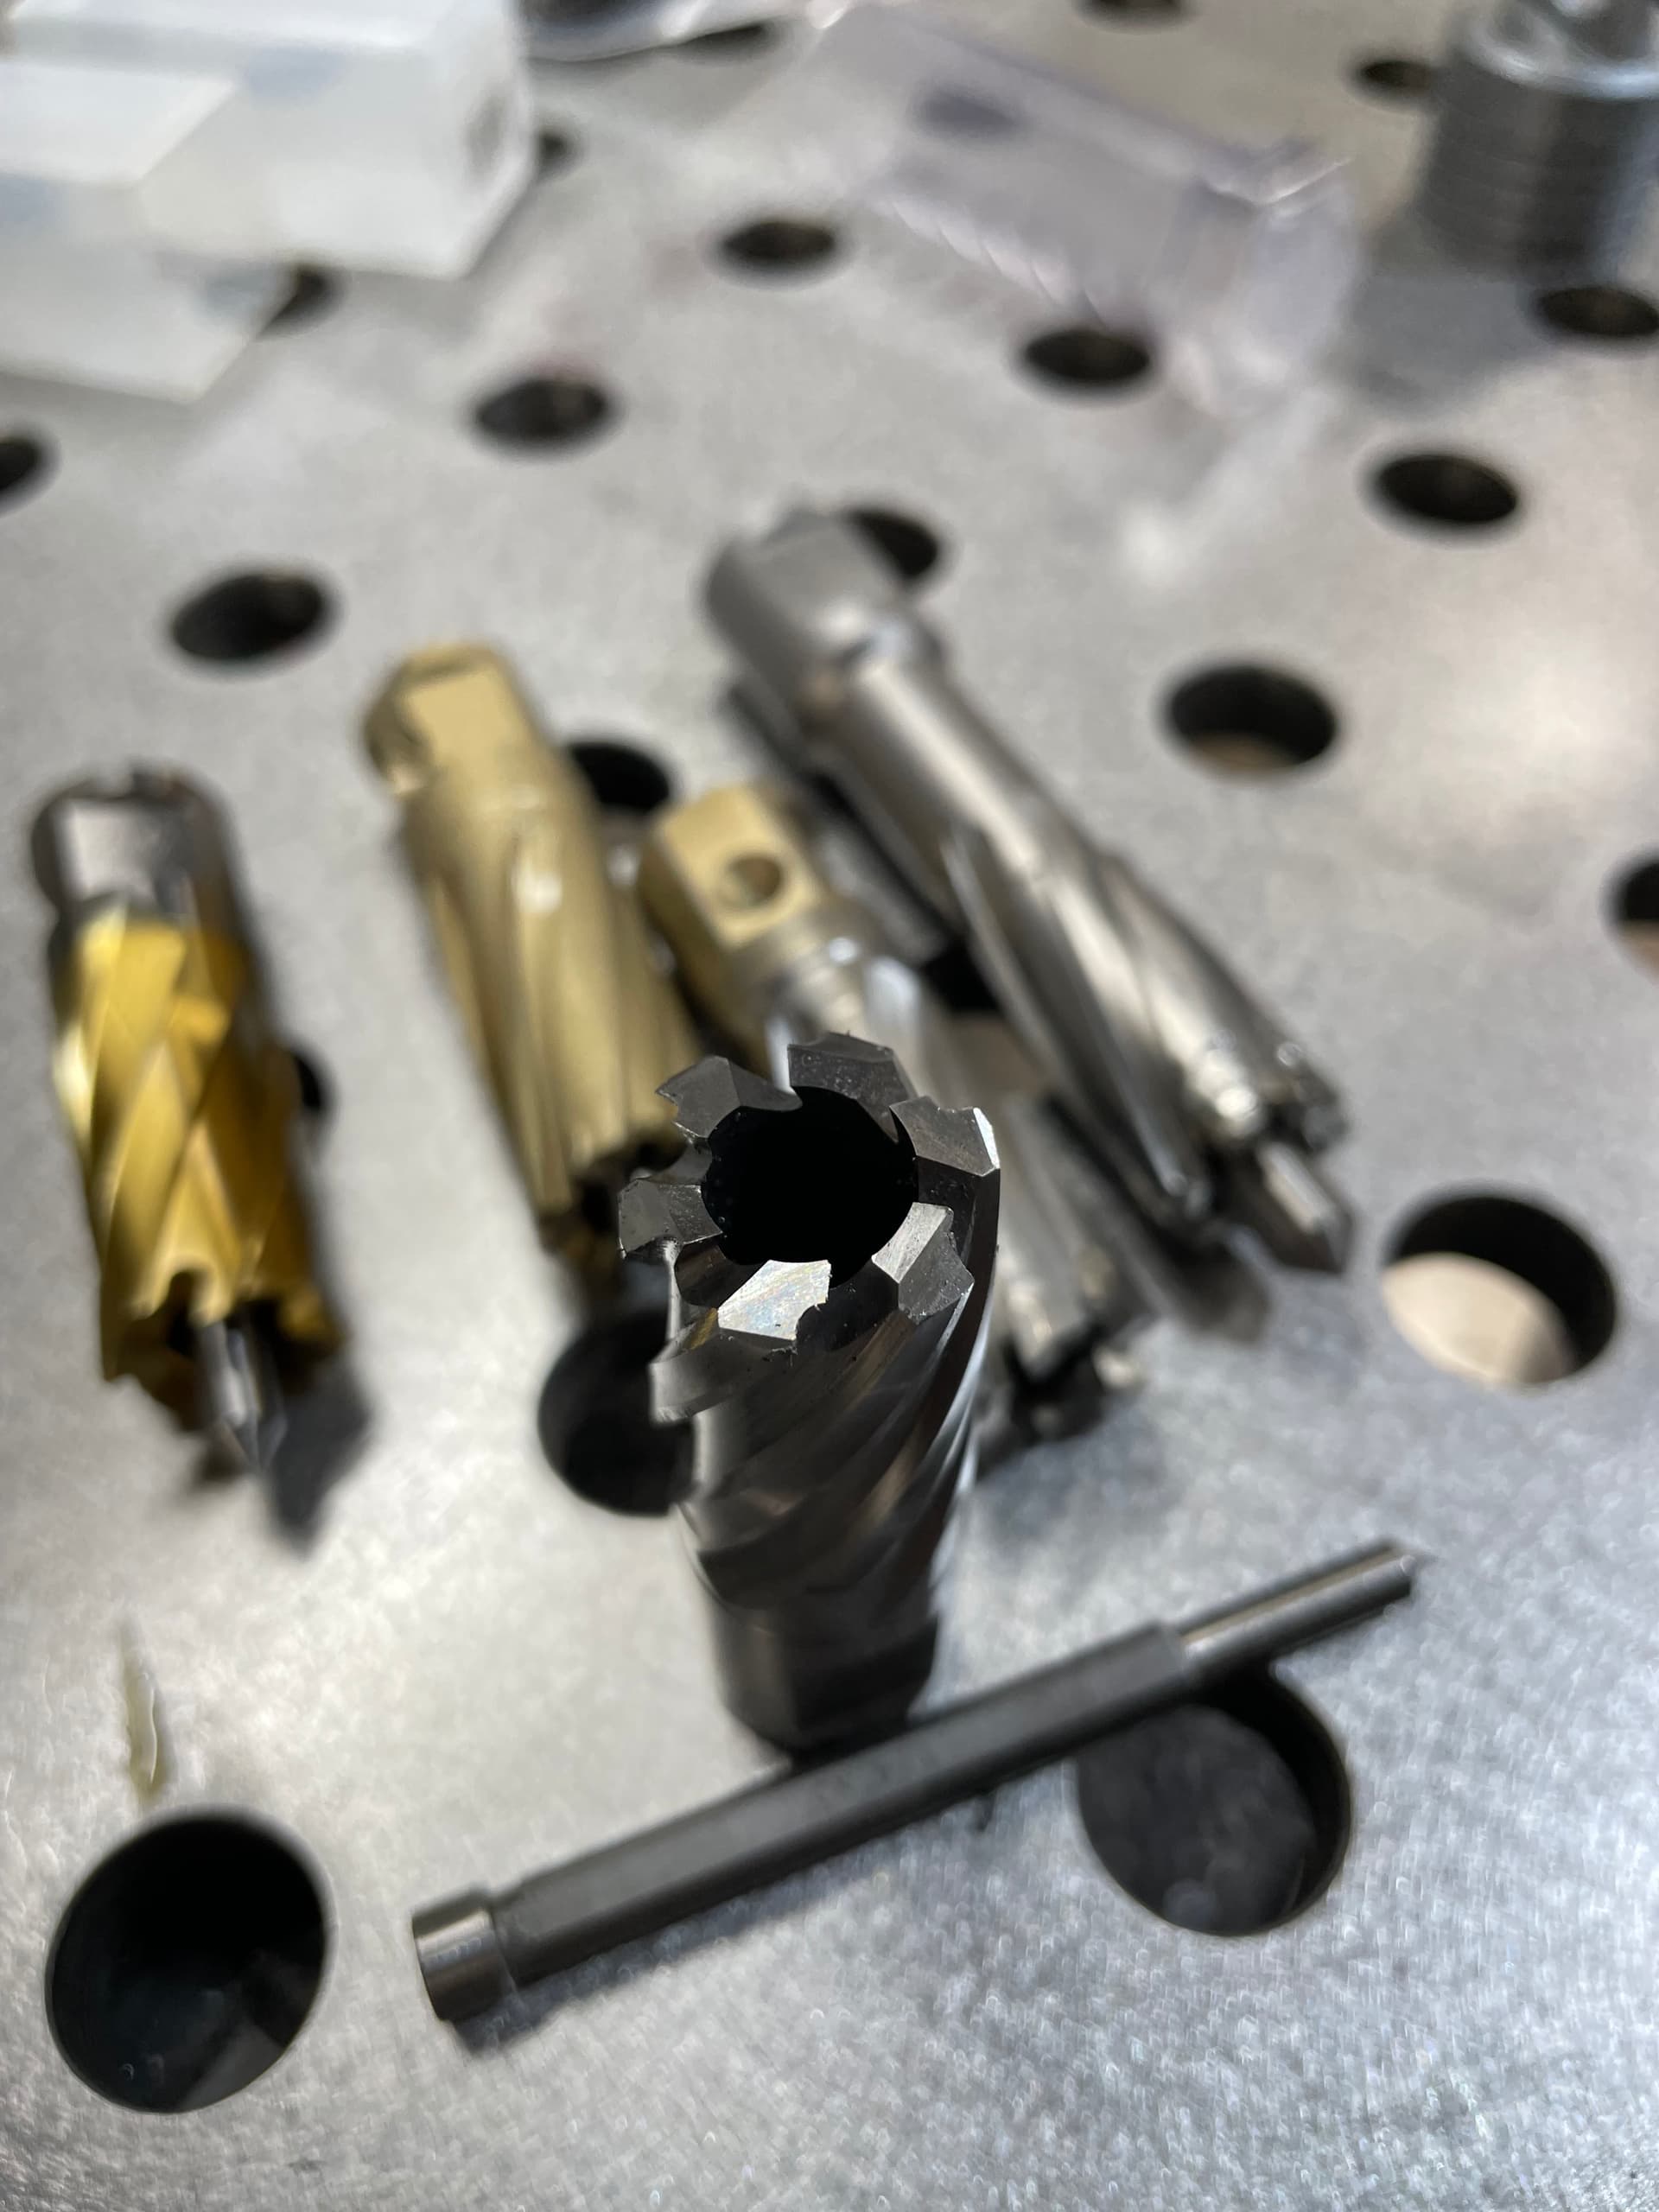
Ready to drop these end skirts off and drill 187 table top holes. HMD904 and Copperhead cutter doing the work. Do not skimp on cutting fluid. Per Hougen, they advise one arbor cup/reservoir per hole. Idk what it holds but maybe 3-4 TBSP? I’m using the sample rota magic it came with and it works well enough I purchased a whole gallon of concentrate today to finish the job. Just flood it and send it!
For circular sawing it is always best to make a single cut with the blade at max depth. This way the forces on the blade are pulling the saw down not back. Also, you want to have an accurate and rigid reference to control the saw’s path. This can be something as simple as a guide fence to a liner rail system. However, it is critical that you measure and adjust everything to be as accurate as possible. These are hand tools and not made to precision standards. The blade is probably not parallel to any surface on the saw or perpendicular to the shoe. It’s up to you to make them that way. You will need at least one good reference at least as accurate as you want the finished product to be.
You might want to read Moore’s “Foundations of Mechanical Accuracy”.
You can build amazing precision with basic hand tools, it just requires a lot of time and discipline to do so. You mention that your cut edges are not accurate. You can fix that in a number of ways. Everything from a guided angle grinder to hand scraping can do the job to the level of accuracy you desire.
Accuracy is what I strive for even without the most precision of means.
A fence was used with the saw. The problem I believe is blade depth. When a sheet of steel costs $600 it’s not a medium to experiment on. (When cuts are 48” to 71” in length) The best conclusion upon my research was not to exceed the material depth or to take skim cuts working with 1/2” plate. My logic agreed with some info I found that full depth was best for cut performance by having fewer teeth in the cut and least amount of surface area per tooth contact. However those points were argued and shot down with the fore mentioned. Also in my mind it probably helps mitigate blade deflection by bringing the plane of the cut closer to the axis of the blade.
The remaining plate is prepped to drill the skirts tomorrow for the 30x60 table outside. Once those are complete, I plan to revisit the circular saw utilizing my new 50” precision straight edge and full blade depth.
My plates aren’t perfectly flat (as would be expected) I noticed on some holes near the edge the entire drill would begin walking against the magnetic adhesion. Accurately described in thread above. I may save the table top surfaces until the webbing etc is finished and I have a slightly flatter surface to drill on.
While waiting for replacement cutters that are being kicked around Chicago I found an overnight cheapo to be delivered to make some progress and try some stuff.
I made a center punch guide to work with the template which worked really well. Punched 11 holes in record time. However the tolerance in the slug ejector is enough to throw the pattern off.
So time was lost utilizing the template to get row 4 back on track and come back to row 3 to ream the holes with the template once again in place.
The next strategy was to make a partial plunge on each row and reposition the drill over each one with the template removed. Worked exceptionally well however twice a much time invested. All of the replacement cutters on order are 1” DOC (because that was working before it broke) I may end up buying a 2” DOC which should have better chip evacuation manners. However the issue is the drill must leave the table every hole to clear the template. Requires more chip sweeping to ensure garbage isn’t stuck under the magnet.
Finished half the table top. (88 holes drilled without rest) Very excited for this! The process is punishing but I’ll be so happy to use these!
I didn’t explain it very well because I was in a rush to post.
Row 3 was center punched utilizing the template. Template was removed and the holes drilled lining up the slug ejector point on the punch marks. The center punches were dead accurate. Too much play in the ejector to hold tolerance. It’s too troublesome to line up each time without side loading the point. Idea was immediately abandoned.
Testing 4 flute 12000 series Hougen cutter tomorrow. Ordered 2 of them in tin coating seen on far left, 1 plain. Also 1 replacement copperhead.
The upright cutter you see is Amazon brand Stead and Fast HSS. 88 consecutive holes and zero noticeable wear. Absolutely worth the $32 same day shipping
Across all that I have they seem the same. The ejector pins all have nice fit and finish. It’s user error trying to line it up on the target and impatience that side loads them enough.
When the row was finished slightly less than half of the holes in the row or sharing pin locations with the previous row fit. Most were close enough that the fence block could be forced but that’s a bad idea.
By locking the template on the previous row, I passed through them once over and you’d be hard pressed to find the “ovaled” holes.
The time consuming part was skipping over the fudged row and reestablishing accuracy. Which has been verified using the length of the template and testing pins and alignment across 9 holes in several configs. All good.
Id love to try making a table like that, but the little bird on my shoulder keeps saying “ don’t your gonna mess it up” maybe someday I’ll have more confidence!! Your pics show a table id be very happy with!!