We’re excited to introduce our new Fireball Tool V Blocks. They are some of our favorite tools to use on a fixture table. Here’s a complete breakdown of the lineup and how to get the most out of each one.

What is a V Block?
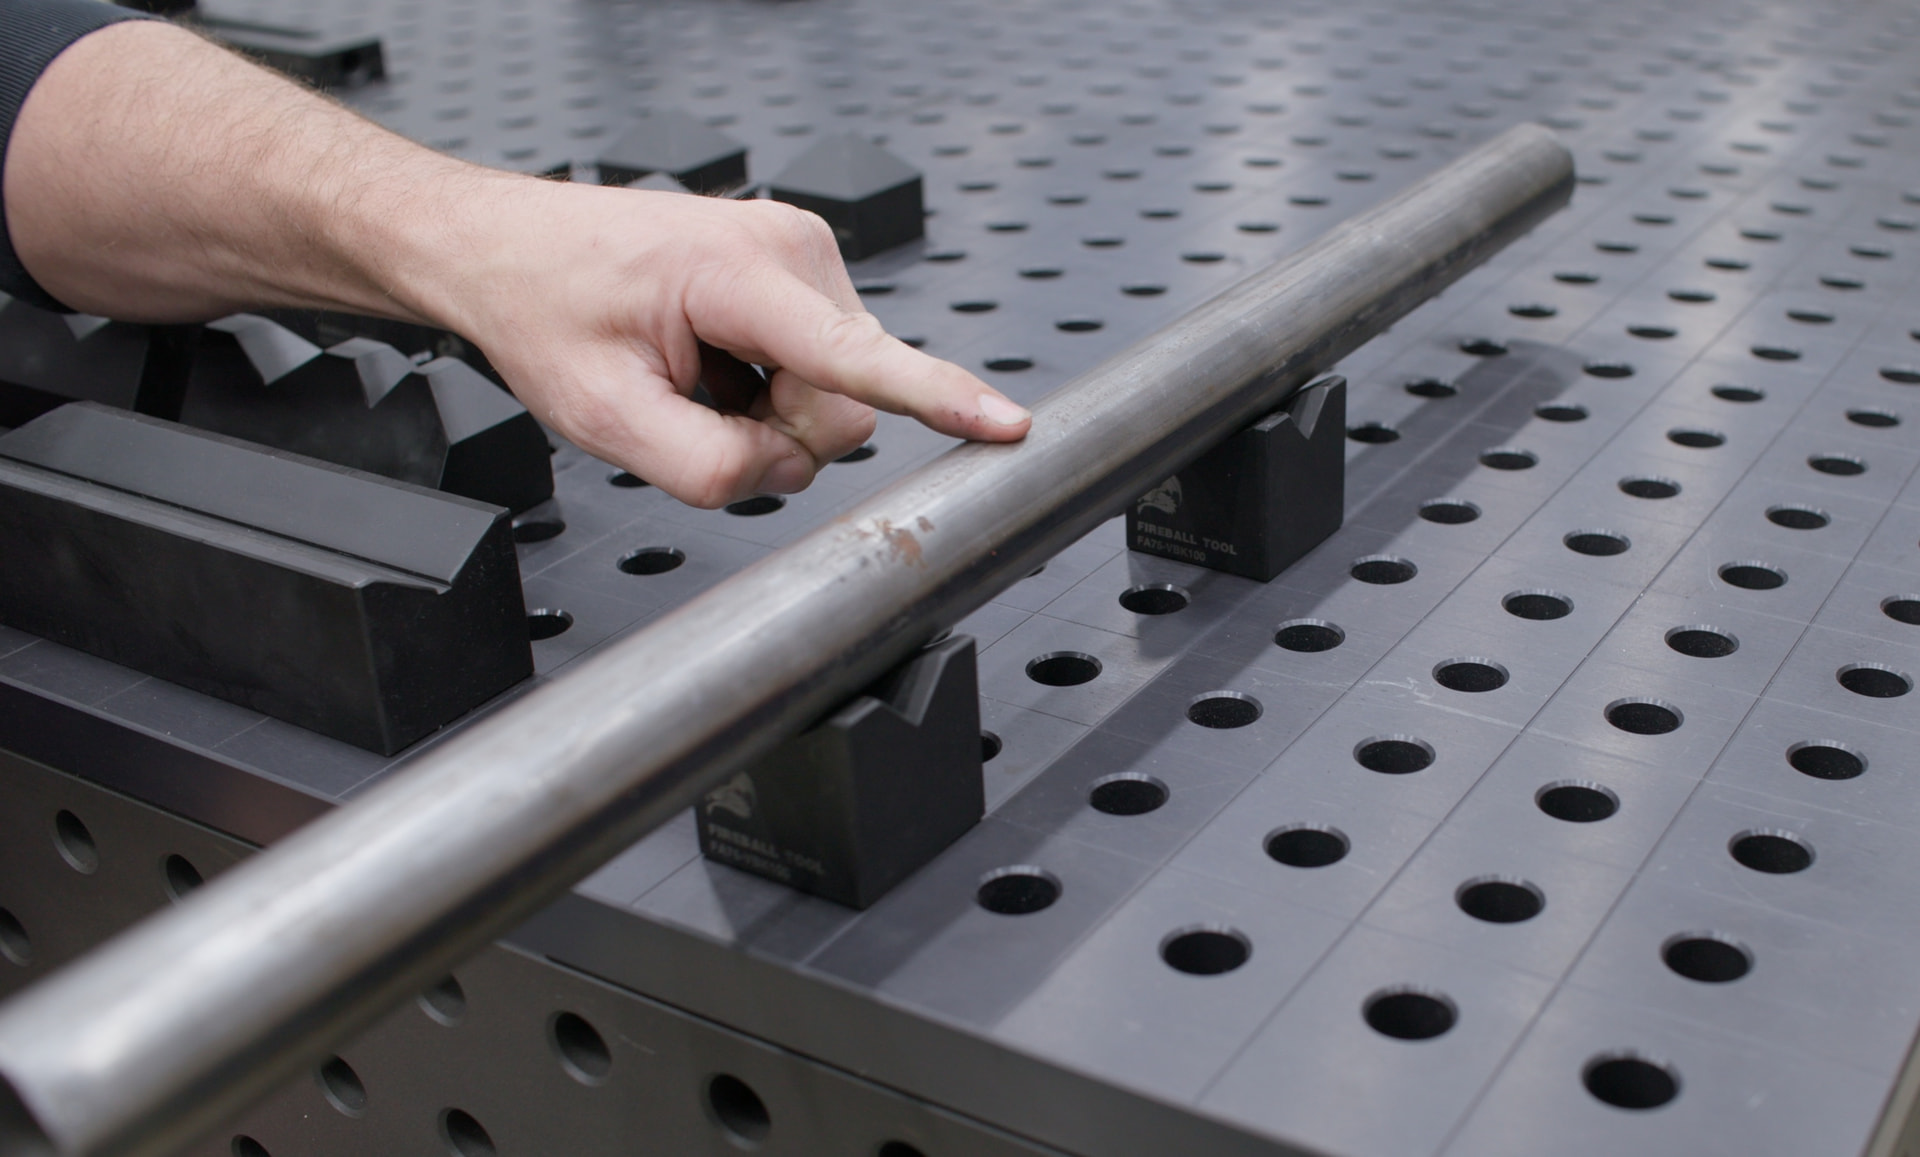
A V Block is designed to hold round tubing or material. Drop the V into a table hole, set a piece of round tube into the V, and the block centers the tube, controls its elevation, and keeps it from rolling. That’s the general idea but as you’ll see, these blocks can do a whole lot more.
The 2x2 V Block
This is the block most of you are probably familiar with, we’ve had it for a few years now. It’s a 2x2 block with both a 120-degree V and a 90-degree V. Why two angles? Large material, like a piece of 4-inch tube, sits best in the wide 120-degree V, while small round rod nests nicely into the 90-degree V.
You’ll notice several pin locations on this block. The pin drops into a hole to locate the block, but it can be moved around to the side, or stood up vertically to hold material vertical. Want the 90 instead of the 120? Just move the pin to the adjacent side.
We use 3/4-inch holes and pins throughout, which means the block can be bolted down. Use the threaded bolt holes to bolt the block to a riser, dial in the axes, calibrate where you want it to land, torque it down, and it stays put.

The 4 Side Pyramid Block
The pyramid blocks are still 2x2 with a single pin in the bottom. The pyramid design lets you space the blocks further apart to widen the V out. Spacing them wider drops the V deeper, giving you a bigger hold on larger material. Essentially, you can create a V just about as far and as wide as you want.
The pyramid shape can also be used to center tubing from the inside. It lands inside of round or square tube, which opens up some clever fixturing options we’ll cover below. Like all of these blocks, they’re machined on all sides.

The Mini V Block
This little block is quickly becoming one of our favorites. It’s a 2x2 block, one inch wide, with corners cut out and a V in the top. Because it’s its own little square, you can square small stuff up to it and clamp it. Use a pair of them together and you can set round material on top.
There are holes on multiple surfaces, so the block can be flipped to its side and with a pair of them, you’ve created a wide V. Set wide objects in them and use the table spacing to widen the V out as needed. Like any other Fireball product, it’s multi-use: use it as a regular stop for butting objects against, or roll it around to the front face and drop it in for a really low side-profile V.
Here’s a bonus: pull one of the pins out of the Sidekick vise and drop two of these blocks in, one on each side. Now you’ve got a V pipe jaw inside the vise for holding round stock and they rotate, so you can flatten round material too.

The Wide V Block 5x1"
This V Block is a variation of our most popular tool, the fence block. On top you get a wide 120 and a shallow 90 for round tube. You’ll also notice two 45s. One on the side and one on the end.
Like all Fireball products, these work together. Flip one block to its side next to another and you’ve created another V. The 45 on the end creates yet another V when blocks run parallel. More V’s than you’ll know what to do with and they can be spaced as far apart as you want.
The big flat surface on the back makes a nice stop to bump material up against, creating a V between the block and the table. To run perpendicular and in line with the table holes, use the standard two-bolt spacing. To run at a 45, simply unthread one pin and move it to the 45-degree position.
Need the V somewhere other than directly over a hole? Use the double-wide tooth block chassis. With its slots and teeth, you can drop it in the hole with a pin, move the V anywhere you want, and lock the bolt down to fix it in position.

The Wide V Block 5x2"
We also went ahead and made a 2-inch wide version. You get the same 120s and 90s and all the same surfaces, but the wider block gives you even more stability. Put two of them together and you get a really tight, low V for small material or move them apart as far as you want. They have the same bottom configuration to hit 45s as well.

The V Block XL
This one is a 2x2 piece of solid steel with a 120-degree V on top and a 90-degree V on the front. On the bottom is a series of pinholes for adjusting the distance between blocks. Use a screwdriver to pull the pin back and reposition it. One row gives you half-inch increments, the other row gives you quarter-inch increments measured off the face. Just remember to leave three holes between the pins. That lets you get the blocks closer together and fine-tune the spacing.
This is especially handy when the blocks are turned 90 degrees, since you can control exactly where the V sits in relation to your material. When you’re not using it as a V, you’ve got a big block with a big surface to clamp to.

Controlling Elevation
The easiest way to adjust height is with shims. Put a shim under the block and you control the height that way.

Want to get higher off the table but stay centered in the hole? Because we use a 3/4-inch system, you can unthread the pin and thread in a rod. Set a 2-inch shim block on top and you’ve got simple elevation control.

One of the reasons we picked the 3/4-inch hole is that it’s DIY friendly. Pick up some 3/4-10 all-thread and some cheap nuts and thread it into the bottom of the block. Now you have precision elevation changes with the nut, and you can still bolt the assembly to the table or fixture. There are a million ways to do this, and that’s what makes this table system so versatile.
You can also stack two tooth blocks on top of each other with a tooth block washer, adjust the height, and lock it down with all-thread. Now you’ve got elevation control and offset control without over complicating anything.

Holding Tubing at an Angle
Holding tubing at an angle only takes two points. Take a couple of the 2x2x1 blocks, thread them in loosely, set the part so the blocks center on it, then come back with a tool and tighten locking those two points in position.
To hold the part down, we like to use the Double Dragon clamp (we’re still working on the name). Drop it into the riser and tighten it up. Add a second one up top to capture the part. If you’re working with square tubing, use the clamp to push the material up against the back of the block; it gives you precision in and out.

Holding Material from the Inside with the Pyramids
Say you have tubing that needs welding all the way around the outside, with multiple tubes coming into the surface that you can’t grip it from the outside. This is where the pyramids shine.
Unthread the pins and bolt the pyramids to a riser using a single tooth washer with a bolt. The teeth on the washer engage with the teeth on the side of the block, setting an exact elevation that won’t slip or slide. Get it close, fine-tune the elevation, and lock it in. If you’d rather slide freely, just flip the washer so the flat side faces the block.
Set up a matching pyramid on the opposite riser. The scale on the side lets you match the elevation perfectly to the first one. Two perfectly aligned blocks create a V at the top, so you can either set material on top with controlled elevation, or hold the tube from the inside. Now you can tie parts into that piece, and with it fixed exactly where you want it, everything else falls into place.

That’s the full V Block lineup!